Quick Start
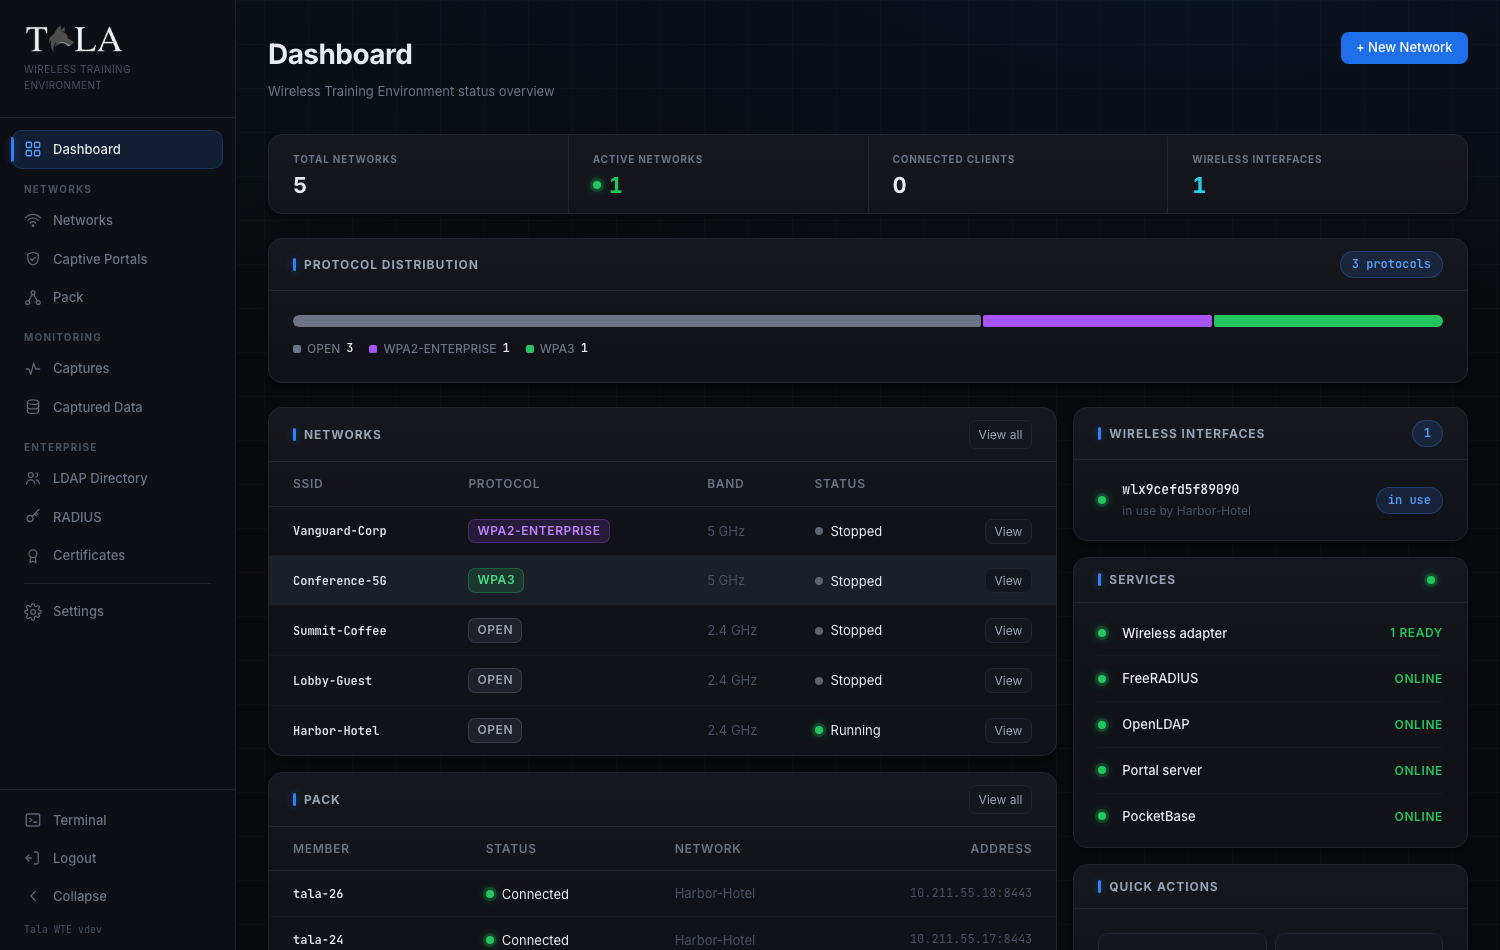
Overview
The shortest path from a fresh install to seeing captured data: open the console, create your admin, stand up an Open network with a captive portal, connect a device, and watch what it submits land in Captured Data.
This assumes Tala WTE is already installed (see Installation) on a host that meets the System Requirements and has a Wi-Fi adapter that can host an AP.
1. Open the console and finish setup
Browse to https://<host>:8443/. The certificate is self-signed, so accept the browser warning.
On a fresh install you get a setup wizard. Enter an admin email, a password (at least 10 characters), acknowledge the license, and create the account.
SCREENSHOT NEEDED: the first-run setup wizard (admin email field, password field, license acknowledgment, and the Create account button). This is the setup page, not the sign-in.
After setup, the screen becomes the normal sign-in and you land on the dashboard.
2. Create an Open network with a captive portal
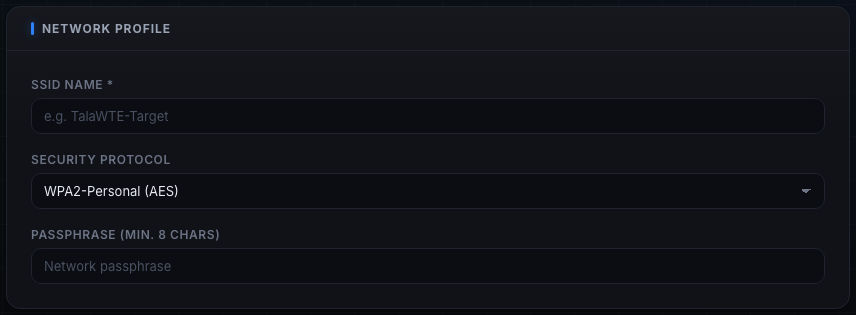
Go to Networks and click + New Network. Fill in the form:
- Network Profile: give it an SSID (for example
Cafe-Guest) and set Security Protocol to Open (No Auth). Choosing Open reveals the Captive Portal Sandbox option. - Captive Portal Sandbox: enable it and pick a Portal Module from the gallery (for example a coffee-shop email-capture or a hotel login page). A live preview appears. If you picked a validating portal (hotel, login, voucher, membership), leave the credential set on its default; one is auto-generated, or choose No set - capture only to record entries without validating.
- Hardware: pick a Frequency Band and Channel, and the Wireless Interface that will broadcast. Bands the adapter cannot host as an AP are disabled automatically.
- Topology: the defaults are fine to start (Internet Passthrough on, subnet
10.0.0.0/24).
Save the network. See Networks for the full breakdown of every option and Captive Portals for the portal library, auth types, and credential sets.
3. Start it
Click Start on the network's row. An Open network comes up immediately. If the adapter you saved with is gone, Tala WTE claims a free one automatically (and falls back to a band it supports). The status dot turns to running.
Open the network's Details page to see live status, connected clients (MAC, IP, signal), and a streaming log.
4. Connect a device
On a phone or laptop, join the SSID you created. Because there is a captive portal, the device is intercepted and shown the splash page before it can reach the internet. Enter something into the portal form and submit.
No spare device? Use a Tala WTE client instead: export the network's client config from its Details page (Export client config), import it on a client-mode box, and connect, or drive it from The Pack. The pack member fills the portal automatically.
5. See the captured data

Open Captured Data. Every value submitted to the portal lands here in a table of Network, Captured (timestamp), Username, Password, Result, Source, MAC, and IP. The Source tag reads target for a real device or pack member for simulated traffic.
That is the core loop. From here:
- Add a packet capture: go to Packet Captures, start a Network-layer capture on the running network, and read the Analysis tab for protocol mix, top talkers, and any cleartext credentials.
- Try a WPA2-Personal network for handshake-capture labs, or a WPA-Enterprise network (use Auto-provision & Start to bootstrap the CA, RADIUS, and LDAP in one click).
- Keep the network alive with generated traffic via a client or The Pack.